The toilet flange secures the toilet to the floor and also, connects it to the drain pipe. It is usually made up of rubber, metal, or PVC material. This unit is secured with bolts properly. Sometimes, you may see erosion in the floor near the toilet, it can be because of the loose flange. It can lead to leaks on the floor. Other than this, this can damage the floor to a great extent. In case the toilet flange is loosened in your home, you can fix it or replace it without any technical help. Follow this guide to know how to replace a toilet flange. Check out this step-by-step guide to replacing toilet flange in your home.
Tools and Materials Required
To carry out the toilet flange replacement process, you will need some tools and materials. Below we have listed all of them.
- Power drill
- Plunger
- Phillips head screwdrivers
- Oscillating tools
- Adjustable wrenches
- Paint scrapers.
- Flanges
- Gaskets, seals, wax, and rings
- Wood screws
- Flange nuts
- Masonry and concrete anchors
- Lag bolts
Steps to Replace Toilet Flange
Step 1: Drain the Toilet
The very step is to flush the toilet and empty it. for this, you need to follow the steps mentioned below.
- To start with, you will have to disable the water supply to your toilet. You can find the supplied knob on the floor or wall at the back of the toilet.
- When done, you will have to flush the toilet multiple times so that there is no water remaining there.
- Next, you will have to remove the remaining liquid from the basin with the help of a plunger. Other than this, you can utilize towels or sponges to wipe off the liquid.
- When done, you need to make sure to keep towels near you so that you can remove any standing water.
Also, read- List of Best Flushing Toilet to Enhance your Bathroom’s Elegance
Step 2: Removing the Tank
Now, the next step is to remove the toilet tank. Make sure to carry out this step carefully to avoid any damage. Follow the steps mentioned below.
- The first thing that you have to do is lay towels on the floor so that there is no damage caused to the floors.
- After this, you will have to look for the mounting bolts and then loosen the nuts. You can find two or three nuts. One will be present on each side and the other may be present in the middle. Also, make sure to keep them safe and properly because you need to use them later.
- When done, raise the tank properly and carefully. Place the tank in a location where it will out of your way.
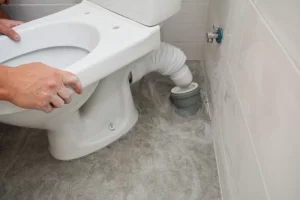
Step 3: Removing the Bowl
Now that you have removed the tank, the next thing is to remove the toilet bowl. Make sure that you have a partner for this step because the bowl can be heavy for you. Follow the steps mentioned below.
- To start with, you will have to use a screwdriver and then remove the caps. You will then have to use a wrench and remove the nuts. Keep them in a safe place for later use.
- Next, you will see that the toilet bowl is sealed with a wax ring to the flange. You will have to gently try to rock the bowl and break the seal.
- When done, raise the bowl safely and then use the towels to keep the bowl.
Step 4: Detach the Old Flange
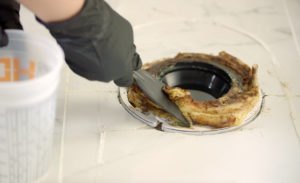
So, to replace the toilet flange, you need to replace the old one. This step needs to be performed very carefully. Check out the steps mentioned below.
- First, you will have to pull out the pipe from the drain using a towel. It will help you to prevent odors and also, won’t let you lose the bolts down the drain.
- After this, you will have to cleanse the ring and then cleanse the base of the toilet flange using the paint scraper.
- When done, you need to remove the bolts and the screws. In case they are in a condition to use again, you can keep them aside.
- You may be able to remove it by gently lifting it. This can be done with the gasket-sealed PVC flange.
- Next, if the flange is stuck with the glue and you are not able to remove it, you may have to call a plumber and get it done for you. You must not do it on your own because it can damage the pipe. You will have to pay a lot more money to get the drain pipe fixed than you would pay the plumber to replace the flange.
- Other than this, if you notice that the subfloor is damaged, you will have to cut it using an oscillating multi-tool. You will then have to replace it using the suitable one.
Step 5: Choose the Correct Toilet Flange Replacement
After removing the older flange, you need to look for the perfect replacement. For this, check out the steps mentioned below.
- You will first have to measure the area or diameter of the drainpipe exposed. You can then use these measurements to find a new flange for you.
- Next, you need to check if the Old flange is in the condition to use again, you can carry it with you to the nearby shop and ask for the correct replacement.
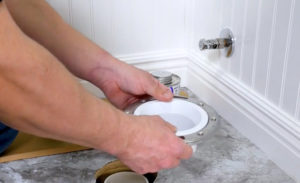
Step 6: Installing the New One
Now that you have found the perfect toilet flange replacement, you need to install it. Below we have mentioned all the steps that you need to follow.
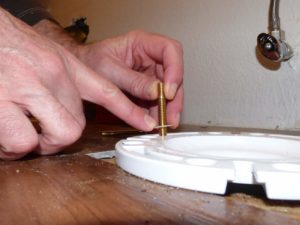
- To start with, you need to place the flange securely on the subfloor. You can use cement screws or wood screws for this. It depends on the material of your subfloor.
- Next, you need to slide the bolts into the new flange and use nuts to secure them in place.
- In case you are using the gasket-sealed PVC, you will not need to use the adhesive.
- When this is done, you will have to install the wax ring. You need to find the wax ring according to the width of the floor. In case you have replaced the thicker tile with the original, the wax ring should also be thicker. Other than this, you may get the appropriate size wax ring with the flange. To install the wax ring, you can use two options:
- Method 1: You can simply center the ring on the flange and then lower the bowl in its position.
- Method 2: For this, you will have to place the bowl on the floor and then attach the replacement ring to the location. With this, you can get better positioning and accuracy in placing the toilet.
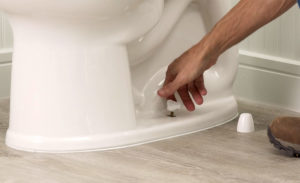
Step 7: Change the Toilet
This is the last step in replacing the toilet flange. To do this, follow the steps mentioned below.
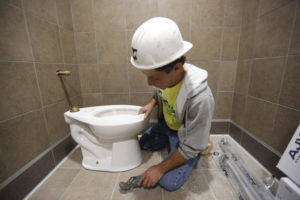
- To start with, you will have to put the toilet on top of the flange that you have changed. You may have to hold the bowl in your hand so that you can get a better grip.
- Next, you will have to lower the bowl and then apply some pressure for setting the seal. You will have to make sure that you do not move the toilet after you have set it up. This can lead to the breaking of the seal and lead to leaks in the future.
- Now, you will also have to change the nuts and washers and also, tighten them up. But, you need to make sure not to tighten them too hard because it can lead to breaking.
- You need to change the bolt caps.
- Next, you will have to change the tank of the toilet and then align the bolt’s shank.
- Now, tighten the bolts properly to secure the tank.
- When it is done, you will have to attach the water supply line again. Check if there is any leak and let the tank fill.
- In the end, you will have to flush it and check the base for any leaks.
You can also read- Best Tankless Toilets Reviewed
To Conclude
With all the steps mentioned above, you will be able to replace the toilet flange easily. We have mentioned each step of the process in detail for your convenience. In case you still face the issue, we will suggest you call a plumber. We hope that this guide has helped you.
FAQs
How much does it cost to replace a toilet flange?
The cost to change the flange could vary. If you are changing it on your own then it can save labor costs. So it depends on every factor.
When to replace the toilet flange?
It should be replaced every time you change your toilet seat.
Can you put a new toilet flange over an old one?
No. You can not. You should not even try this because this can make the matter worse.
Is the toilet flange glued to the pipe?
Yes. It is glued to the pipe and also it is screwed to the pipe.