It may be better to upgrade your toilet if it has acquired breaks or spills, consumes far too much water every flush, or is merely a hue of bright blue you haven’t seen in two decades. You would think now is the time to contact the plumber, but for a moderately skilled DIYer, it can all be done with a day’s effort. Because toilets are heavy and cumbersome, it isn’t for the faint of heart, but if you have got a great physique (or willing assistance), you may save money on a home visit of a plumber and its team to install the toilet instead of doing it yourself.
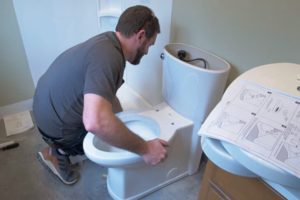
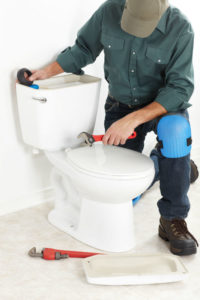
Before getting into the installation of a toilet you need to collect all the parts that come with handy in the package of toilet. Learn the manual to understand the basic work procedure of each and every part of a toilet. The below-explained image along with their name will help you to guide in this installation tutorial. So, learn and understand the name and work for an easy installation process.
Now after overviewing all the parts of the toilet you have to take one step forward towards the installation of a toilet on your own. So let’s check out the step-by-step guide to complete your work.
How To Install A Toilet: Explained in Steps
We come up with a tutorial guide to explain every bit of the installation process of a toilet to you in a simple manner.
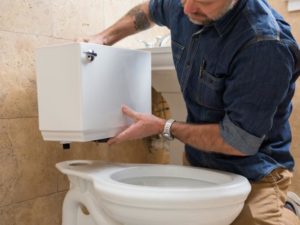
1: Remove The Old Toilet
If you’re changing a toilet, you’ll get rid of the old one indeed. If the previous toilet’s flange and screws are in perfect shape, they could be recycled when setting up a new toilet.
The following is a step-by-step guide on removing an old toilet and installing a new one:
- Turn the water off at the closed valve near a toilet, either on the walls or even on the floor.
- To empty all of the water from the tank and toilet bowl, hit the flush button within the toilet. Plunge any residual water down the sewer line with a shovel. Drain any residual water from the reservoir with a towel and a container while wearing protective gear or gloves.
- Using a torque wrench, remove the supply route. It may be difficult to loosen slot one or both attachment ports if the connection was never disconnected or was attached for a lengthy period of time. If this is the case, decompose any rust with a heavy-duty lube.
- Keep a pail and cloth handy to capture any stagnant water that seeps from the distribution network and clean it up.
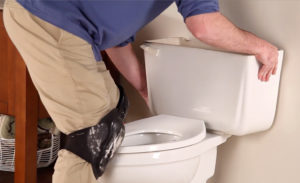
- It’s typically simpler to detach the container from the bowl first if you’re operating alone. It might be hard for one individual to carry both parts simultaneously.
- Loosen the nuts that attach the vessel’s base to the bowl with an adaptable wrench.
- Remove the tank from the bowl by lifting it high up and setting it away.
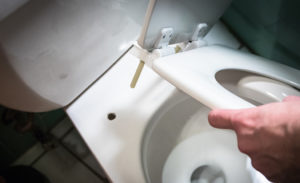
- Remove the commode bolt covers and release them. If required, use a screwdriver.
- Loosen the screws and washers on the studs that attach the bowl to the ground with pliers or an extendable wrench. If the bolts are corroded in position, lubricate them with the heavily loaded grease to release them. Then, as often as possible, spin the bolts to make room at the bottom of the bolts. Remove the bolts using a hacksaw.
- Use a utility knife to slice through the caulking seams if the toilet is silicone caulk all around the bottom.
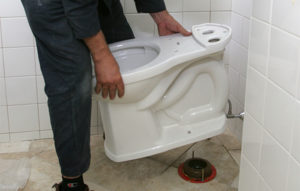
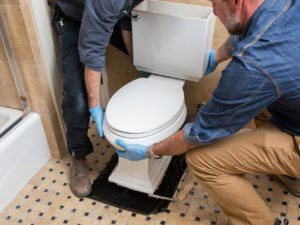
- Rotate the bowl back and forth slowly until it comes loose so you can remove it. To reveal the undermount sink seal, slide it to the edge.
- Remove the old toilet seal with a putty knife. Remove any excess with a wet towel or sponge.
- Fill the open space on the floor with a cloth to prevent gas from entering your home. Get rid of the rag before installing the new toilet.
2. Examine the flange of the Toilet
Before you answer the question “How to install a toilet?” make sure you know if the toilet flange needs to be replaced. The flange connects the ground to the toilet and serves as a critical link for the toilet’s base components. Substitute it with a similar flange if it is fractured or damaged.
3: Prepare the Floor and Soil Pipe for Installation

- To stop sewage gas and avoid equipment items dropping in, put a cloth into the dirt pipe.
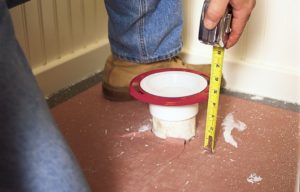
- Make sure the hole on the floor is big enough to fit the pocket flange all the right up to the top. If the opening has to be bigger, use a pen to sketch all around the flange’s bottom, then use a jigsaw to slice away the extra carpeting. No rafters should be removed.
- Dry-fit the dirt pipe into the curve in the wall. Put the flange over the soil line and calculate the length between both the finish flooring and the base of the flange’s collar.
- Pull the dirt pipe and cut it to the prior step’s dimensions with a handsaw. Scrape the cutting edges with such a utility knife to eliminate burrs.
- Dry-fit the flange to the soil pipe during this step and the soil pipe to the closet bend at the same time to ensure the collar of the flange sits on the floor.
3: Install the Soil Pipe and Closet Flange
- Wipe PVC primer underneath the closet curve and outside with one side of the dirt pipe as the following step in replacing a toilet. Apply PVC cement to the identical places and bend the soil tube into the nearest curve as soon as possible.
- The leading edge of the soil tube and the interior of the cabinet flange should be primed and cement-applied. Until the collar is placed on the ground, twist and push the socket onto the dirt tube.
- Turn the collar only until holes on the left side of the opening are aligned. (The storage bolts should queue up perpendicular to the walls behind the reservoir when placed into the slots.)
- Securing the collar to the floor requires stainless steel screws long enough to reach the subfloor.
Tips: Fix a PVC flange with a fixed collar before the cement hardens and align the bolt slots.
4: Place the Stop Valve Within the Wall
- In this step, you are required to Turn off the water supply valve in the lavatory to conclude the question “How to install a toilet?”
- Submerge the supply route in a container, then break it using a tube cutter. Allow roughly 1 inch of the tube for the stop valve and escutcheon to be attached. Let the water flow from the pipe.
- Disconnect the stem and lever from the valve. (The plastic gaskets on the stems may be damaged by welding heat.)
- Using a cloth, dry the pipe on the inside and out. To use a cord pipe cleanser, wash the inner surface outside the pipe, as well as the interior of the valve’s intake. Flux in both regions with the same amount of flux.
- The escutcheon must be placed over the supply route, accompanied by the stop valve, with the valve’s output pointing upward.
- With a propane torch, heat the stop valve joint on the supply line. Remove the flame from the joint as soon as it is hot enough to melt the solder. Solder is applied to a joint when a drop forms on the bottom.
5: Install the wax ring, then set the bowl up

- The brass hardware closet nuts should be inserted threaded end up into the slot of the flange collar. Use brass washers to cover each.
- The wax ring should be placed flat-side down over the flange and pushed in gently.
- You need to find the holes in the base of the closet bolts to align the holes in the toilet bowl with the bolts during this process.
- The bottom of the bowl must rest on the floor before you press the wax ring into the bowl. Do not move the wax ring or twist the bowl. If the floor is uneven, shimming the bowl might be necessary.
- Install nylon washers over each bolt before threading the nuts. As you tighten the nuts, alternate between tightening the nut and tightening the wrench. When you find solid resistance, stop tightening the wrench; otherwise, the bowl will crack.
- A hacksaw can be used to cut the threads on the closet and bolts two threads above the top of the nut. Snap on the plastic bolt covers.
Also read: 11 Best Low Flow Toilets To Save More Water In Toilet
6: Install The Tank
- You have to ensure the rubber screw connecting the tank to the bowl (or spud) is securely attached to the tank.
- Put the rubber tank washers and the tank bolts into the tiny openings in the interior of the tank.
- The tank bolts’ ends should fit into slots on the top of the bowl as you carefully place them over them.
- The nuts should be hand-threaded after the washers are slipped on the bolts.
- As you tighten the bolts, rotate each nut from nut to nut and make sure the tank is level repeatedly while holding the bolt heads in place with your screwdriver. If the porcelain is overtightened, it will crack.
- A flapper chain must be connected to the tank’s handle.
7: Assemble the supply line and seats
- Bend the supply route with a tubing stretcher to fit here between stop-valve output and the tank-supply connection. Then, with the curved end facing up, position the tube between such two locations and label half an inch underneath the outlet. This will ensure that there is an adequate line within the outlet.
- To use a tube cutter, cut the supply route at the point mentioned previously.
- Attach the plastic nut, compression nut, and compression ring to the supply route in that sequence. Apply a small layer of Teflon glue to the outflow screws of the valve, then insert the lines in the outlet and tighten the pressure band.
- Screw the plastic nut on the supply line underneath the tank by hand. Then, using a wrench, tighten the compressive nut.
8: Finishing Touch
- Tighten the nuts on the bolts by hand after insertion through the bowl’s seat holes and the seatback.
- When the main supply line is switched on and the stop valve is opened, allow the tank to fill. When installing a toilet, the final step is to check for leaks six times.
How To Install A Toilet: You Need Some Tools To Do It
If you are encountering an article on “How to Install a Toilet?” then the section on the tool that explains the name and using techniques are explained will definitely take place. So here we are! This article also has that section where you will get to know about the tools you are required to install a toilet.
- Hack saw
- Wax ring (if your tiles are thick, you will need an extra thick one)
- Toilet flange repair ring (metal or plastic flange versions are available, just make sure you select the appropriate one for your existing flange)
- Wrenches and/or pliers with adjustments
- Drill driver/hand-held screwdrivers
- Putty knife
- DAP Kwik Seal Caulk
- Toilet shims (if needed)
- An old rag
- Towels/sponges
- Toilet plunger
- Gloves
Conclusion!
Hopefully, you liked this article that explains “how to install a toilet on your own without any expert assistance?”. This article has all the important aspects about the article that you are important to acknowledge for completing the tasks of installing a toilet. Within the post, we tried out best to provide you with all the steps that will help you throughout the installation process of a toilet and explain some hardware tools that going to be used in this process. If you like this article please let us know in the comment section below. Your suggestions are precious to us.
FAQs
How to install a toilet seat?
Installing a toilet seat is a very easy process. Here we are enlisting a few steps through which you can install a toilet seat.
- Remove the old seat.
- Examine the flange of the toilet.
- Prepare the floor and soil pipe.
- Install the wax ring now you can install the tank.
How to install a basement toilet?
Basement toilets are built up with different technologies. This technology is known as an upward flushing system. You can easily install them. It is a bit of a difficult task but one can do this with the right plumbing solutions.
How long does it take to install a toilet?
It can take up to 4 hours. The Minimum time to install a toilet is 1 hour. It depends on the experience and the surroundings of the toilet.
How much does home depot charge to install a toilet?
The standard fee that home depot charges are 99 dollars. Everything is included such as the materials, labor cost and the toilet seat itself.