One day you flush your toilet only to realize that the tank isn’t filling up with water like it’s supposed to. You watch as the water slowly drains away, and your heart sinks as you realize you’re in for a long and unpleasant day. But don’t despair! In most cases, a toilet tank that doesn’t fill up with water is an easy problem to fix.
In this article, we will walk you through the most common reasons why your toilet tank might not be filling up and how to fix them. So before you call a plumber, check out this guide and see if you can troubleshoot the problem yourself. Chances are, you will be back to flushing in no time!
Reasons For Toilet Tank Not Filling With Water
Here are some of the most common reasons why your toilet not filling up with water –
Faulty Fill Valve
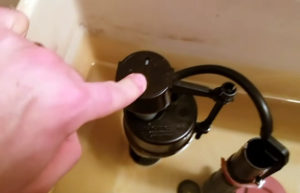
The fill valve is the mechanism in the toilet tank that controls the flow of water into the tank. Over time, fill valves can become worn out or damaged, which can cause them to malfunction. If your fill valve is not working properly, it may not be allowing enough water into the tank to make it full. Luckily, this is an easy problem to fix. Simply replacing the fill valve should do the trick.
Also, read- Most Powerful Flushing Toilet For Clean and Fresh Bathroom
Incorrect Height of Toilet Float
The toilet float is another important part of the toilet tank. The float sits on top of the water and signals to the fill valve when the water level has reached the correct level. If the float is set very high, the water will shut off before the tank is full. Conversely, if the float is set very low, the tank will overfill and water will begin to leak out. Adjusting the height of the float until it is at the correct level should solve this problem.
Leaking Flapper
The flapper is a rubber seal that sits at the toilet tank’s bottom and covers the hole that leads to the bowl. When you flush your toilet, the flapper lifts up to allow water to flow through and then falls back into place to seal off the hole. If your flapper is damaged or not sealing properly, it can cause your toilet tank to slowly drain after each flush, which will prevent it from ever filling back up again, thus causing the – toilet tank not fill issue. Replacing your flapper should solve this problem.
Cracked Overflow Tube
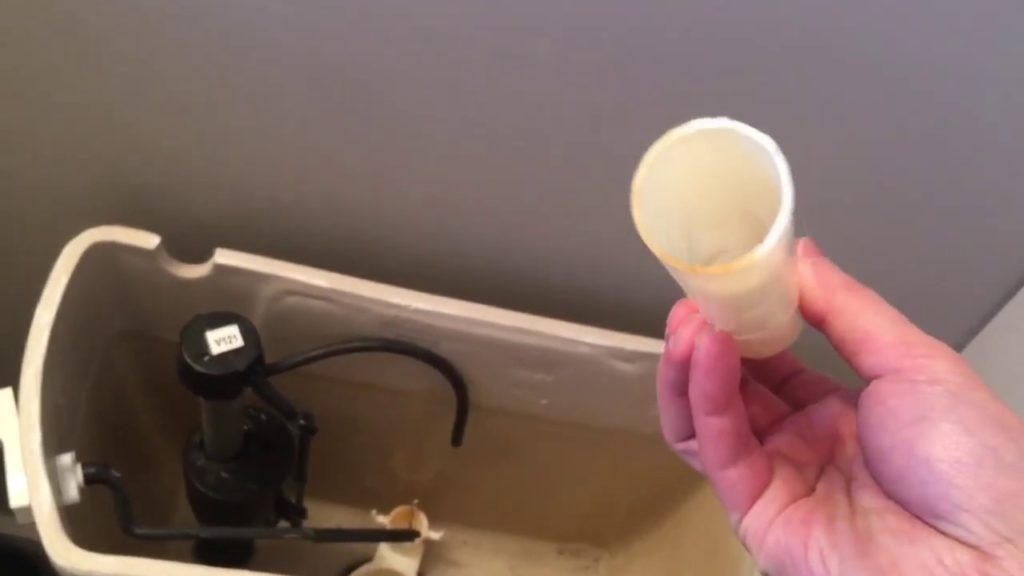
The overflow tube is a small pipe that sticks up out of your toilet tank and allows excess water to escape if your toilet begins to overfill for some reason. If this pipe becomes cracked or damaged in some way, it can cause water to constantly drip out of your toilet tank, preventing it from ever filling back up again. Replacing your overflow tube should solve the toilet not filling up the problem.
Low Water Pressure
If you have low water pressure in your home, it can affect your toilet’s ability to fill up properly after each flush. This problem can be more difficult to diagnose because there are many possible causes of low water pressure (e.g., clogged pipes). However, if you suspect that low water pressure may be causing your toilet tank issues, you can try running a test by turning on all of your faucets and seeing if they have adequate pressure. If not, you may need to call a plumber to help resolve the issue.
Float Ball
A float ball or float cup regulates the water flow into the tank. If the float is set wrongly, it can cause the water to flow slowly, resulting in the toilet tank not filling with sufficient water.
- First, flush the water away and take a look at the dial or screw that regulates the float element. If you have a cylinder float, simply squeeze it and move it to the right position.
- Once you have done that, turn on the water supply and keep an eye on the tank as it fills. If it loads quickly and completely, then simply close the lid and you are all set.
Of course, every toilet is different, so if you are having trouble finding the right adjustment knob or screw, consult your owner’s manual or reach out to a professional plumber for assistance.
Clean the Valve
Over time, toilet tank valves can become clogged with mineral deposits, debris, and another buildup. This can cause the valve to become less effective at regulating the flow of water into the tank, resulting in a decrease in performance. Fortunately, this problem can be easily fixed by cleaning the valve on a regular basis.
- First, turn off the shutoff valve outside the tank. Next, remove the cap from the valve by pushing down it and turning it counter-clockwise.
- Once you have access to the inside of the valve, simply clean it with a cloth. You may also need to use a small pick to scrape away any stubborn residue.
- Finally, turn on the shutoff valve. Now flush the toilet for about 20 seconds before replacing the cap and screwing it clockwise until tight.
In most cases, this simple procedure will restore proper flushes to your toilet. However, this instruction may apply to specific models of valves. So, if you are unsure about your particular model, be sure to consult your owner’s manual before proceeding.
Want to Replace the Valve? Here are the Steps
With a few tools and a little time, you can easily do this job yourself and save money on a plumber.
- Turn off your water supply: Locate the water shut-off valve near your toilet and turn it clockwise to stop the flow of water.
- Flush the toilet: This will remove all the water from the bowl and tank so you can work on the fill valve without making a mess.
- Disconnect the main water supply line: There will be a coupling that attached the fill valve to the water supply line. Use an adjustable wrench to remove this coupling.
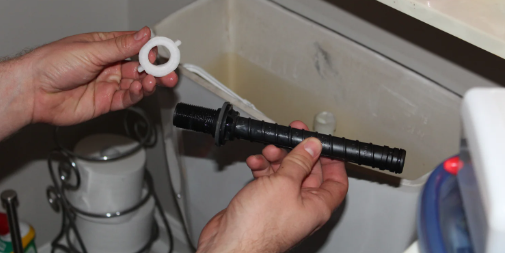
- Remove the lock nut: Use a wrench to turn it counterclockwise until it comes loose.
- Clip the refill off: The refill clip is located on the overflow tube and prevents water from spilling out when the tank is full.
- Lift off the old fill valve: With everything disconnected, you should be able to lift the old fill valve out of the tank.
- Wipe the area to allow the new fill valve to sit properly: Use a rag or paper towel to remove any dirt or debris from around the hole where the fill valve sits. This will help ensure that your new fill valve has a tight seal.
- Adjust the fill valve height: Its top has to be 3 inches over the overflow tube after you properly adjust it.
- Slide in your new fill valve: Once you’ve got the height adjusted, slide your new fill valve into place
- Secure with locking nut: Thread on the locking nut (the same one you removed in Step 4) by hand as far as you can before using an adjustable wrench to finish tightening it down snugly but not too tightly – once it’s hand-tight, another 1/4 or 1/2 turn with an adjustable wrench should do it.
- Connect your water supply line: Once everything is connected, turn on your water and check to see if the level needs to be adjusted. That’s it- you have successfully replaced your toilet’s fill valve!
You may also like- 10 Best Toilet Seats To Enhance the Look & Comfort Of Your Bathroom
Clean or Replace the Flapper
The flapper is a stopper at the tank’s bottom that opens to let water in and closes to prevent water from leaking out. Over time, the flapper can become worn or misaligned, preventing it from sealing properly. As a result, water will slowly leak out of the tank, making it necessary to fill it up more often. Fortunately, fixing a faulty flapper is a relatively easy DIY project. Simply remove the old flapper and install a new one in its place.
- Turn off the water supply first. Check the shutoff valve and just turn it clockwise.
- Keep holding the lever down for a few seconds while flushing the toilet so that you can remove all the water.
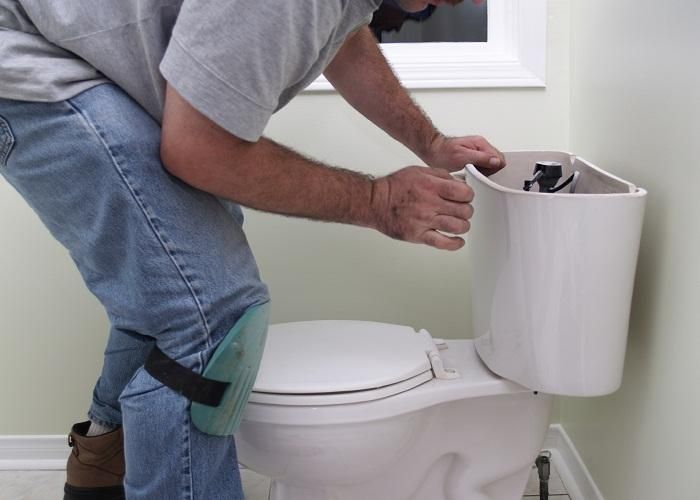
- Remove the toilet lid.
- Remove the handle arm from the lift chain.
- Pull the flapper out of the overflow tube by removing the pegs that secure it
- Ensure the new flapper sits in a clean area.
- Install another flapper and attach the pegs to the overflow tube.
- Attach the handle arm and lift chain together.
- Turn on the toilet’s water supply.
- Check that the toilet tank is filling and there are no visible leaks.
- Reinstall the lid of the toilet tank back.
Some Last Words
Although it can be frustrating when your toilet tank doesn’t fill with water, there are a few things you can do to troubleshoot the issue. By following the tips in this blog post, you should be able to identify and fix the problem relatively quickly and easily.
And if you have tried all of the solutions we have outlined and your toilet tank is still not filling with water, it is time to call a professional. It is possible that you have messed up the installation or repair process and caused further damage. A plumber will be able to assess the situation and get your toilet back up and running in no time. Thanks for reading our guide on how to fix a toilet tank that isn’t filling with water!
Frequently Asked Questions
1. Why is my toilet tank not filling with water?
There are several possible reasons behind the toilet bowl not filling with water and the most common reason is that the float valve assembly is not working properly. This can be due to a bad float valve, a clogged valve seat, or a problem with the fill valve itself. Another possible reason is a leak in the tank. If you have a leak, the water level in the tank will drop, and eventually, the tank will stop filling altogether.
2. Why is there no water in my toilet bowl?
If there is no water in your toilet bowl, it could be because the water supply to the toilet has been turned off. Another possibility is that the fill valve is not working properly and needs to be replaced. Yet another possibility is that there is a blockage in the supply line to the toilet.
3. Why does my toilet keep running?
If your toilet keeps running, it could be because of a problem with the float valve assembly. The float may be stuck in the “up” position, preventing the tank from filling. Alternatively, the fill valve may need to be adjusted or replaced. Yet another possibility is that there is a leak in the tank or bowl. If you cannot determine the cause of the problem, it is best to call a plumber for help.
4. How do you fix a toilet that won’t refill?
If your toilet won’t refill after your flush, there are a few possible reasons. First, check to see if the water shut-off valve is fully open. If it’s not, turn it until you hear water running, then try flushing again. If the valve was the problem, your toilet should now flush properly.
If the valve was already open, the next step is to check the float ball. The float ball is located in the tank and is connected to the fill valve. When you flush, the float ball rises and allows water to enter the tank. If the float ball is stuck, it won’t be able to rise, and your toilet won’t refill. To fix this, simply lift up the ball until it pops free. Once it’s free, your toilet should start refilling properly.


