A cast iron tub is a beautiful and luxurious addition to any bathroom. Not only do they provide a stylish focal point, but they are also extremely durable and long-lasting. Plus, they are very easy to care for and maintain. A cast iron bathtub is made with porcelain fused with an iron. It is then coated with enamel, so, they are much more resistant to chips and cracks than other materials. Additionally, they tend to retain heat well, so you can enjoy a longer, warmer bath.
Are you confused between wanting a luxurious cast iron tub but being not sure if you could handle its weight or maintenance? Here’s what you need to know about cast iron tubs, from their features to their weight to whether or not you should buy one. Spoiler alert: they are amazing!
What Makes Cast Iron Bathtubs So Durable?
One of the biggest benefits of cast iron bathtubs is their durability. This makes them a good choice for people with young children or pets who may be more likely to damage other types of tubs. But what makes them so durable?
Porcelain Enamel Coating
One of the things that make cast iron bathtubs so durable is the porcelain enamel coating. This coating is applied to the metal surface of the tub, which helps to protect it from scratches, chips, and other types of damage. The porcelain enamel coating also makes the tub much easier to clean; any dirt or grime can simply be wiped away with a damp cloth.
Also read- Top 5 Modern Toilets (Features, Performance & More) | Reviewed by Experts
High-Quality Materials
Another reason why cast iron bathtubs are so durable is that they are made with high-quality materials. The iron used in these tubs is very strong and resistant to damage, and the porcelain is also very tough and unlikely to break or crack. This means that you can enjoy your cast iron bathtub for many years to come without having to worry about it being damaged easily.
How much does a Cast Iron Tub Weigh?

Depending on its size, a cast iron tub can weigh 350-500 pounds or even more (when empty). That’s why it’s important to make sure your bathroom floor can support the weight of the tub before you make your purchase. It’s also important to keep in mind that when the tub is full of water, it will weigh even more—up to 1,000 pounds or more. So if you’re considering a cast iron tub for your bathroom, be sure to take its weight into consideration before making your final decision.
Let’s know how much a cast iron tub weighs in terms of models and installment.
Clawfoot Cast Iron Tub
These tubs are a great way to add a touch of luxury to your bathroom. Not only are they beautiful, but they are also very durable. Most tubs are made from enameled cast iron, which is extremely tough and resistant to chips and scratches. In addition, cast iron clawfoot tubs are very heavy, which helps to prevent them from moving around when they are full of water.
They come in different shapes and sizes but most tubs are 50-72″ long and 27-32″ wide, but there are some smaller options available. This cast iron tub weight itself varies depending on the size, but they generally range from 250 to 500 pounds. When you factor in the weight of water, the total weight of the tub can reach up to 1000 pounds. Despite their heavy weight, claw bathtub are typically easy to install with the help of a professional plumber.
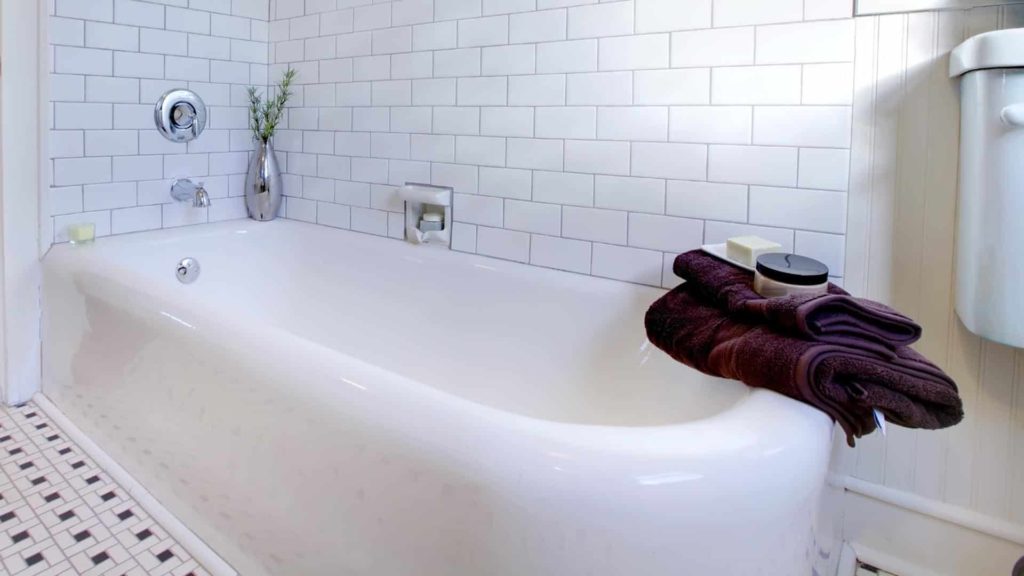
Alcove Cast Iron Bathtub
When it comes to choosing a bathtub, weight is an important consideration. After all, you don’t want your tub to be so light that it blows away in a strong wind or so heavy that it’s difficult to move. The Alcove Cast Iron Bathtub strikes a perfect balance, weighing in at just under 300 pounds without water. Thanks to its solid construction, this tub is extremely durable and will withstand years of use. It’s also surprisingly convenient to clean, thanks to the smooth surface of the enamel coating. Best of all, it is available in a wide range of sizes and styles, so you are sure to find one that fits your needs.
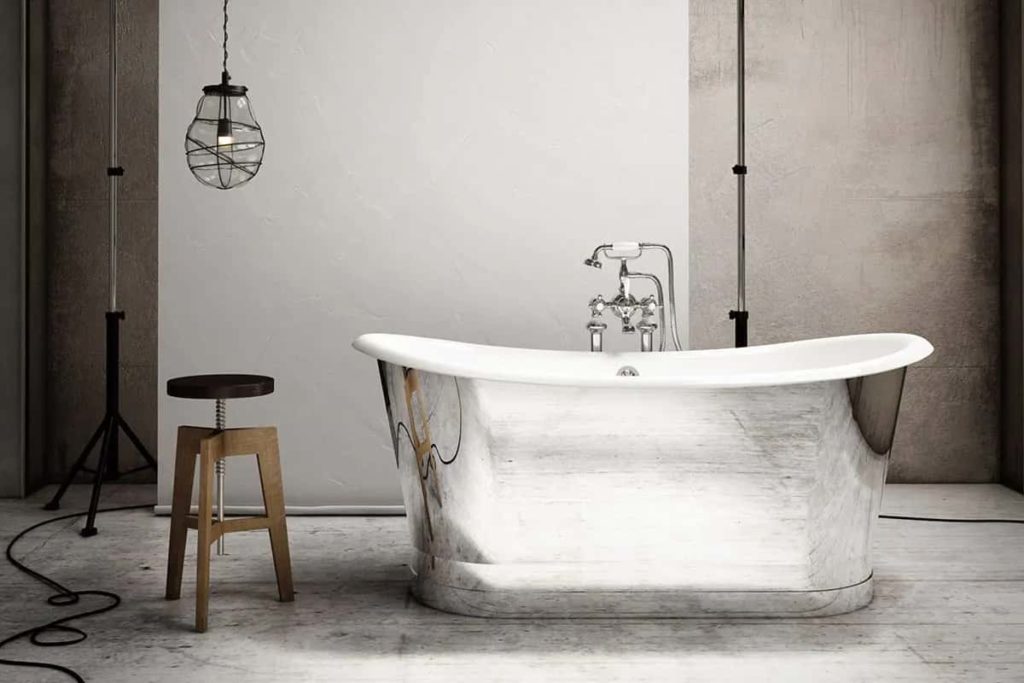
Petite Freestanding Cast Iron Bathtub
The Petite Freestanding Cast Iron Bathtub is a beautiful and unique option for anyone looking for a new bathtub. This tub is made of cast iron, which gives it a classic look. It also weighs 250-300 pounds without water, making it a sturdy option. The capacity of this tub is 32 gallons, so it can accommodate a fair amount of water. Once water is added, this cast iron tub weight increases to about 450-550 pounds.
Despite its heavy weight, this tub is very easy to clean and often comes with an overflow drain. Another great feature of the Petite Freestanding Cast Iron Bathtub is that it is freestanding—meaning no installation is necessary! You can simply set it up in any room or even outside of your home.
Can your Bathroom Floor Support The Cast Iron Tub Weight?
Most people don’t think about how much weight their bathroom floors can support until they’re ready to install a new bathtub. It’s important to know the weight limit of your floors before you choose a tub, because the last thing you want is for your floor to collapse and cause serious damage (or injuries).
- When considering how much weight your bathroom floor can support, you must first consider the materials of which it is made. For example, a concrete bathroom floor will be able to support more weight than one made of wood.
- Next, you must consider the space of the room. A smaller bathroom will have less weight capacity than a large one.
- Water can play a factor in how much weight your bathroom floor can support. If there is a lot of water in the room, such as in a spa or public pool, the floor will need to support the weight of the water as well as any people or objects in the room.
Weight of other Bathroom Essentials
The average person weighs about 200 pounds and there will be other items in the bathroom as well like sinks, faucets, toilet seats, and other accessories. An average toilet seat can weigh about 110 pounds, while faucets and sinks weigh approx. 50 pounds each. Also, bathtubs can vary widely in weight, but most weigh between 200 – 500 pounds.
So, the average bathroom can have a weight capacity of about 900 pounds, but this can vary depending on the type of flooring and the age of the home. If you are unsure about the weight capacity of your floor, it is always best to consult with a structural engineer or contractor before installing a cast iron bathtub. Also, if you’re planning on using your bathtub regularly, it is recommended to upgrade your floors to one that can support at least 2000 pounds.
Refinishing & Refurbishment of Cast Iron Tub | 5 Ways
A cast iron tub can last for generations with the proper care. However, over time they can become dull and scratched. If you have an old tub that you want to refurbish, there are a few things you need to do to get started.
- Clean the tub. Before you do anything, you need to make sure the surface is clean. Use mild soap and a soft cloth to wipe down the entire tub, paying special attention to any areas that are particularly dirty or grimy. Once you’ve finished cleaning, rinse the tub with clean water and dry it off completely.
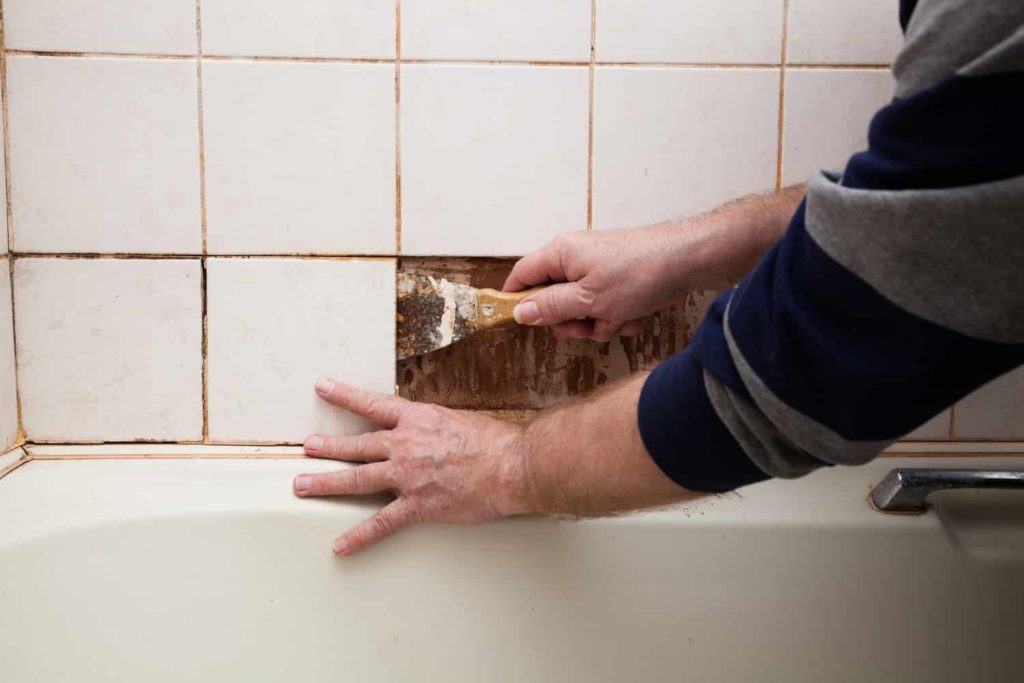
- Repair chips: Take a putty knife and check for any open chips or cracks appearing on your bathtub. Then apply the filler to those areas. You want to make sure the surface is as smooth as possible before you begin painting. Allow the filler to dry completely before moving on to the next step.
- Polish the surface. Once the filler is dry, use fine-grit sandpaper to lightly sand down the entire surface of the tub. This will help create a smooth base for the paint to adhere to. Wipe away any dust created by sanding before proceeding to the next step.
- Protect the area before applying the paint. Once the surface is prepared, you’ll need to protect any areas that you don’t want to be painted. Apply painter’s tape around the edges of fixtures like faucets and drain covers. You may also want to lay down a drop cloth or tarp in order to avoid getting paint on surrounding surfaces like floors or walls.
- Apply the paint. Now comes the fun part! Using a brush or roller, apply a thin layer of paint evenly across the surface of the tub. Allow the first coat of paint to dry completely before applying a second coat, if necessary. After painting, remove any painter’s tape or other protective materials and allow the paint to cure for 24 hours before using the tub again.
Removing a Cast Iron Bathtub
Cast iron bathtubs are both beautiful and durable, but there may come a time when you need to remove or move yours. Removing a cast iron bathtub is no small feat – it takes at least two people and can be quite messy because the weight of a cast iron tub is just too much. Here are the steps:
- Disconnect the drain pipes from the tub by unscrewing the nuts that secure them with a wrench. Place a bucket underneath the pipes to catch any water that may drip out.
- Cut through the caulk sealant around the perimeter of the tub with a utility knife. Be careful not to damage the underlying surface.
- Insert a pry bar between the edge of the tub and the surrounding wall material (drywall, tile, etc.), and gently pry the tub away from the wall. Work your way around the entire perimeter of the tub until it is completely detached from the surrounding material.
- Have one person on each end of the tub lift it straight up and away from its location. Carefully carry it to its new location and set it down gently.
- Reconnect the drain pipes to the tub and screw on the securing nuts tightly with a wrench.
- Caulk around the new location of the tub with silicone caulk sealant and smooth it out with your finger so that it forms an even bead around the perimeter of the tub. Let it dry for 24 hours before using your bathtub again.
Should you Buy a Cast Iron Bathtub?
While modern bathtubs are made from a variety of materials, including acrylic, fiberglass, and porcelain-coated steel, cast iron bathtubs have been around for centuries. Today, cast iron bathtubs are prized for their durability, longevity, and classic style. While they are often more expensive than other types of bathtubs, their durability makes them a wise investment. Cast iron bathtubs are also easy to care for and maintain. If you care properly, a cast iron bathtub can last for generations.
Also, weight is one of the primary concerns for many people. A cast iron bathtub is significantly heavier than other types of tubs on the market, but this weight can actually be an advantage. Always remember that the extra weight provides greater stability, meaning that your tub will last longer and be less likely to crack or chip.
You may also read- Best Smart Toilets- Top 10 Automatic Toilets Review Guide
Some Last Words
After reading this post, you should have a better understanding of cast iron tubs. You know the pros and cons and can decide if a cast iron tub is right for you. Thank you for reading and feel free to share this article with anyone else who may be thinking about purchasing a cast iron tub.
FAQs
Q1. Are old cast iron tubs worth anything?
Many people think of old cast iron tubs as being nothing more than an outdated relic of the past. However, these tubs can actually be quite valuable, depending on their age, condition, and provenance. For example, a cast iron tub that was made in the early 1900s and is in excellent condition could be worth several thousand dollars. In general, the older and more unusual a cast iron tub is, the more valuable it will be.
Q2. How long does a cast iron tub last?
A cast iron tub can last anywhere from 50 to 70 years with proper care and maintenance. To extend the life of your cast iron tub, be sure to clean it regularly and avoid using harsh chemicals or abrasive cleaning pads. You should also avoid letting soap scum or hard water deposits build up on the surface of the tub. If you notice any rust spots, be sure to sand them down and repaint them with a protective coating as soon as possible.
Q3. Do cast iron tubs rust through?
Cast iron is one of the most durable materials available, which is why it’s often used in construction. However, even cast iron can rust if it’s not properly cared for. Rust usually forms around areas where the paint has chipped or worn away, so it’s important to inspect your tub regularly for any signs of damage. If you catch rust early, you can sand it down and repaint it before it has a chance to spread. With proper care, your cast iron tub will last for generations.
Q4. How much do bathtubs weigh?
The average bathtub can weigh anywhere from 100 to 150 pounds. However, the weight of a bathtub can vary depending on the material it is made from. For example, cast iron tubs tend to be much heavier than those made from acrylic.